Would it not be great to have you own Docker container in Docker Hub who everyone can use. In this blog I am going to talk about putting your own Docker container in Docker Hub, based on Azure Pipeline agent on a Raspberry PI 4.
Table of Contents
Summary
In the previous blog ‘How to run a Azure Pipeline agent in Docker container on a Raspberry PI’ we already have created an Azure Pipeline Agent for our devops organisation. In my case that is then ‘https://dev.azure.com/JohanTheDeveloper‘. We also already have a github account, that is in my case ‘https://github.com/johanthedeveloper‘.
In this blog we are going to setup a Docker Hub repository, a github repository and an Azure Devops Pipeline. In this Azure Devops pipeline we are going to get the code from Github, build it on our own Azure Devops agent (from previous blog) and push the container to Docker Hub.
Prerequisites
- Raspberry PI 4 (preferred with 2 GB or 4 GB)
- Micro SD card with 16GB or more
- Ubuntu with Docker installed
- Basic knowledge about:
- Putty
- Azure Devops
- You have read and executed the previous blog ‘How to run a Azure Pipeline agent in Docker container on a Raspberry PI’
How to setup github repository with the code
- Go to https://github.com and login into your account
- Create a new repository. You can do this by login into your github account and then under Repositories add a New Repository
- Fill in:
- Repository name: The name of your repository (azurepipelineagent)
- Description: If you want to have additional description or your project
- Public: of course we want to share our code
- Initialize README: Yes I want to have a default README already setup
- Add .gitgnore: VisualStudio, just to make our live a little easier
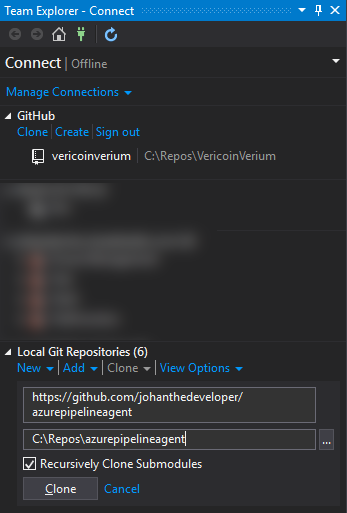
- Clone the repository to your own computer. For me it is the most easy way to say in github to ‘Open with Visual Studio’, but any why of cloning it to local is fine.
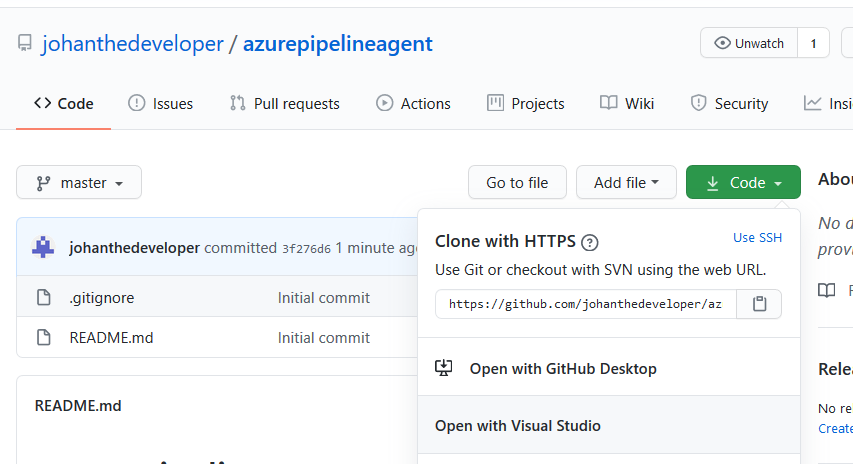
- Clone the repository in Visual Studio
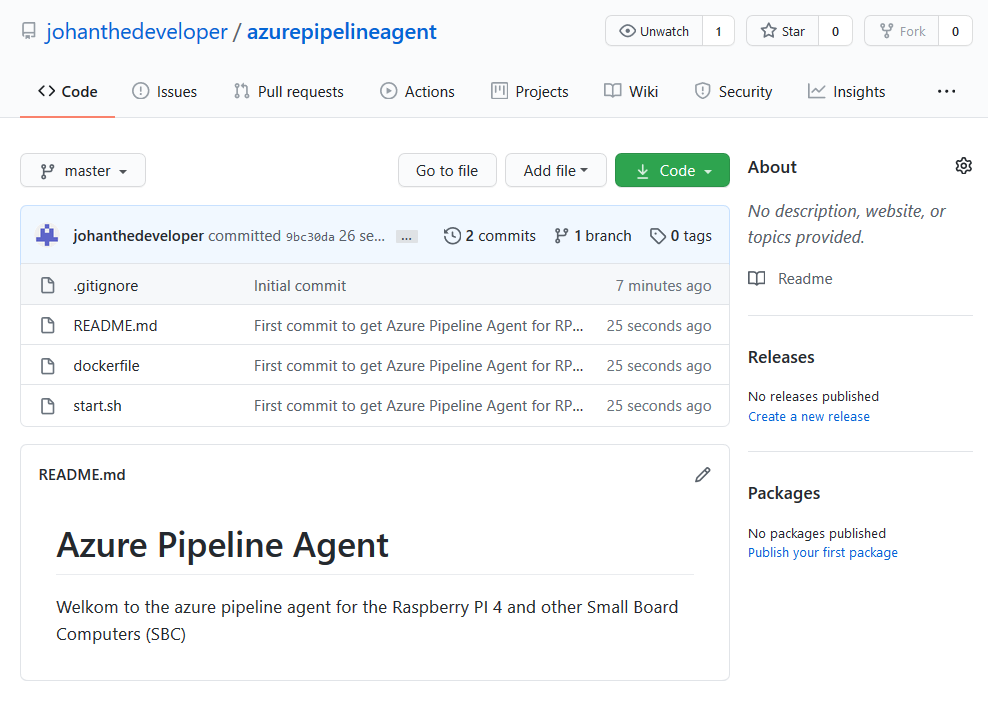
- Now add the files from the previous blog ‘How to run a Azure Pipeline agent in Docker container on a Raspberry PI’ and push it to your repository. Files you need to add are:
- start.sh
- dockerfile
How to setup Docker Hub repository
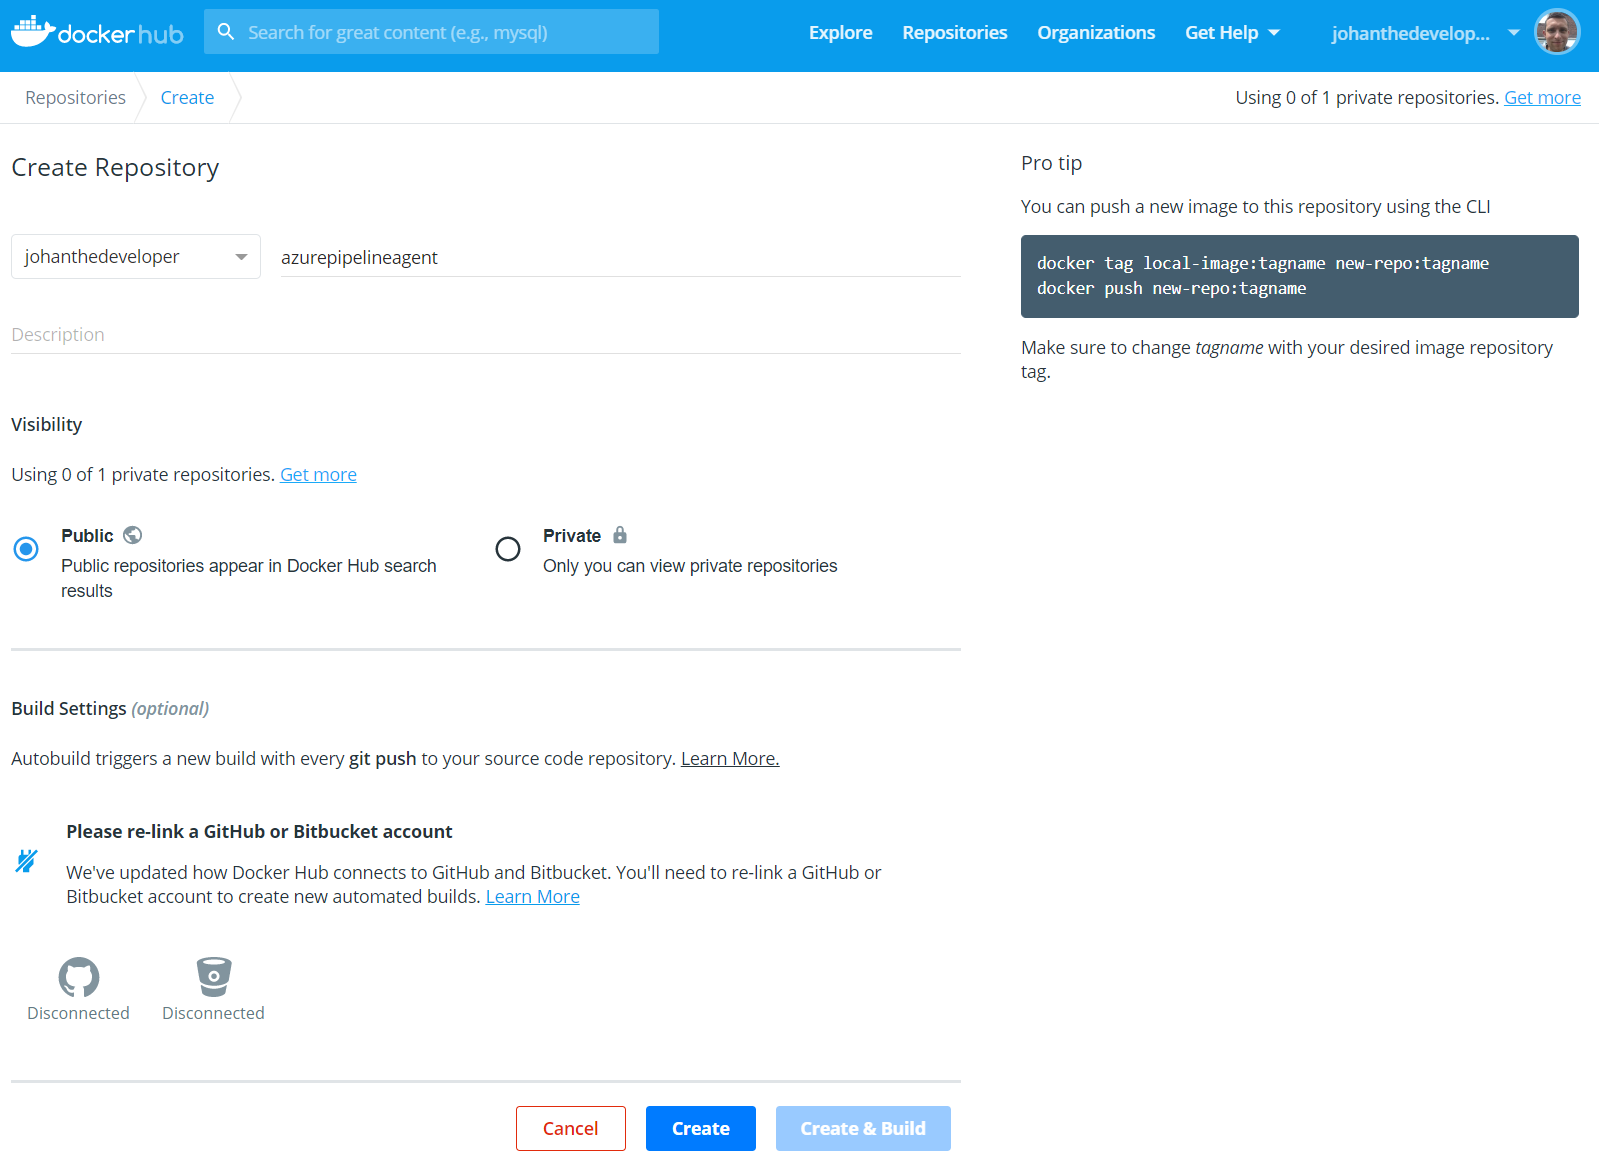
- Login into Docker Hub (https://dockerhub.com) and login
- Click on ‘Create Repository’

- Fill in:
- Repository name: azurepipelineagent
- Visibility: Public
- Click on ‘Create’
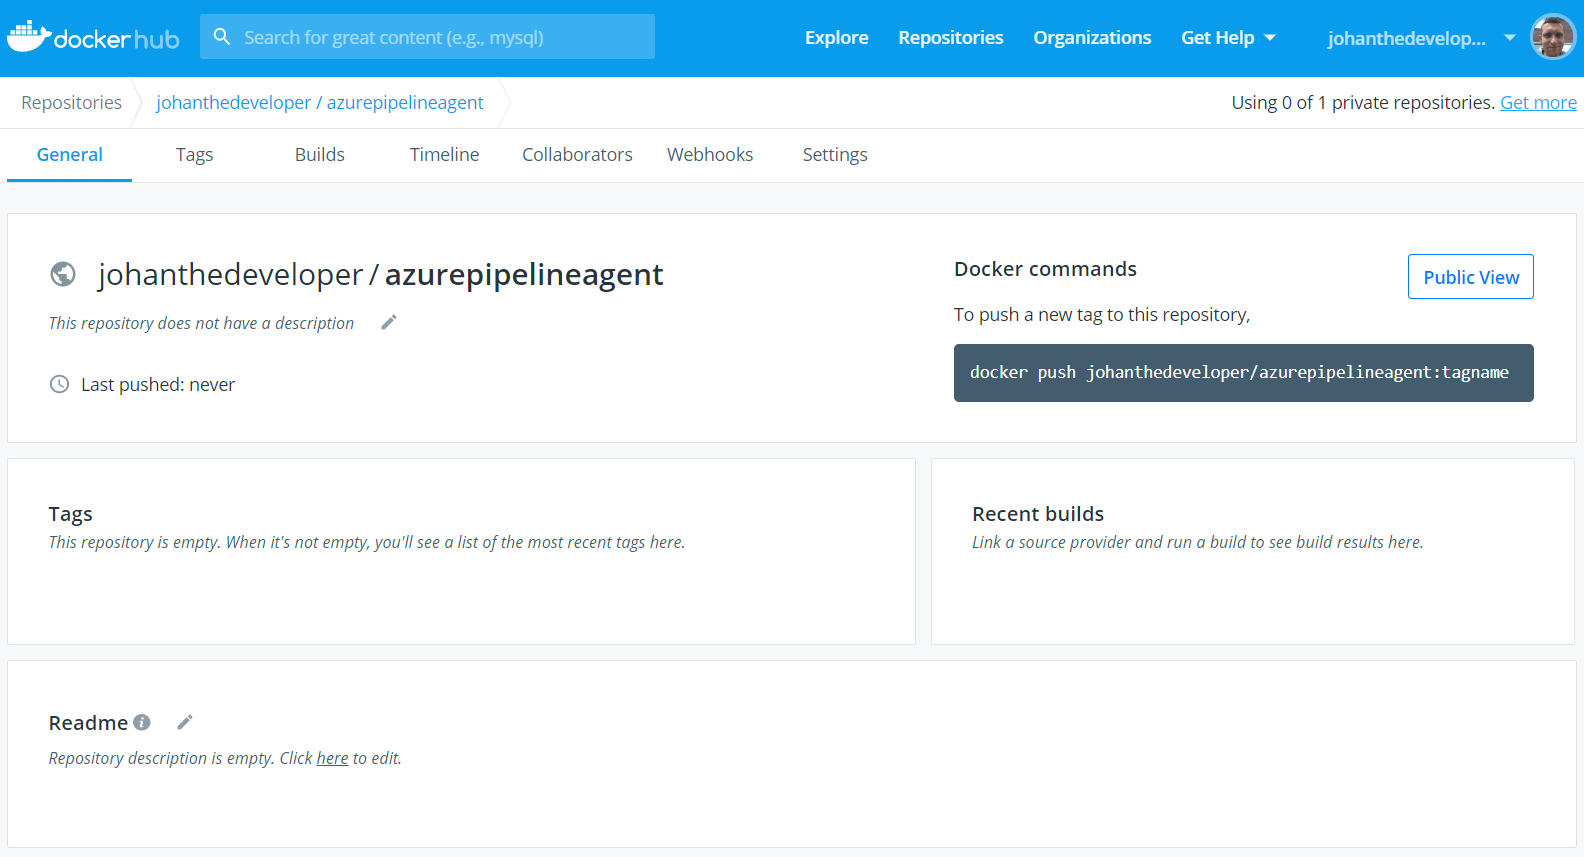
- You know have a Docker Hub Repository
How to setup azure devops project (connecting to Github)
- Create a new repository. You can do this by login into your azure devops account and then under your organisation click on ‘New project’

Fill in:
- Fill in:
- Project name: The name of your repository (AzurePipelineAgent)
- Description: If you want to have additional description or your project
- Visibility: public of course we want to share our code
- Advanced not needed

- Welcome to your azure devops project
- We are first going to setup the connection to Docker Hub
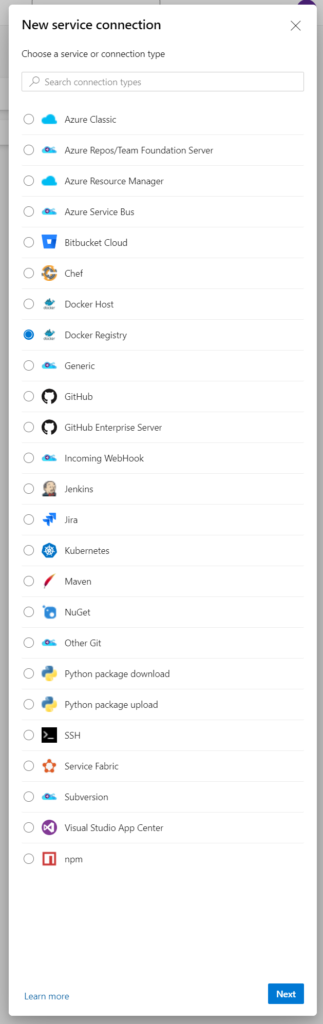
- Go to ‘Service Connections’
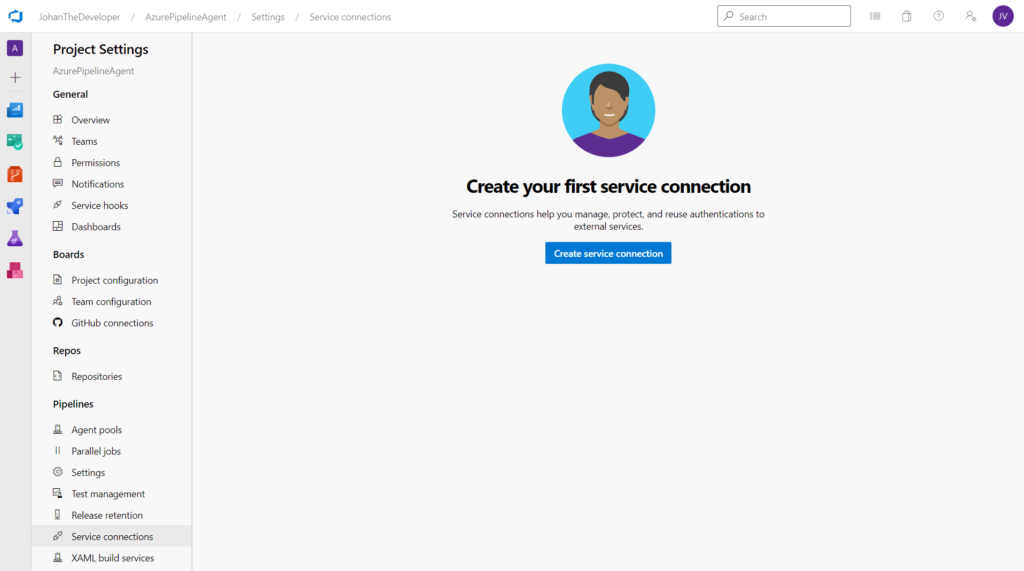
- Click on ‘Create service connection’ and then select ‘Docker Registry’
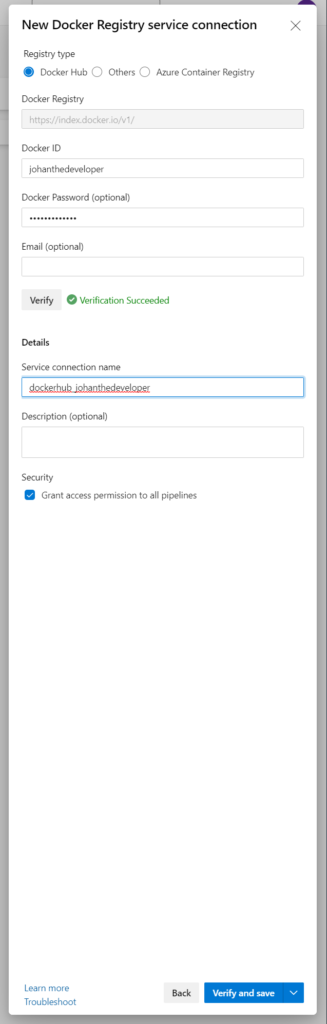
- Fill in:
- Docker ID: Your docker id (in my case johanthedeveloper)
- Docker Password: Your docker password
- Service connection name: dockerhub_johanthedeveloper
- We are now going to Pipelines –> Pipelines to setup a new build pipeline to build and push a Docker image to Docker Hub
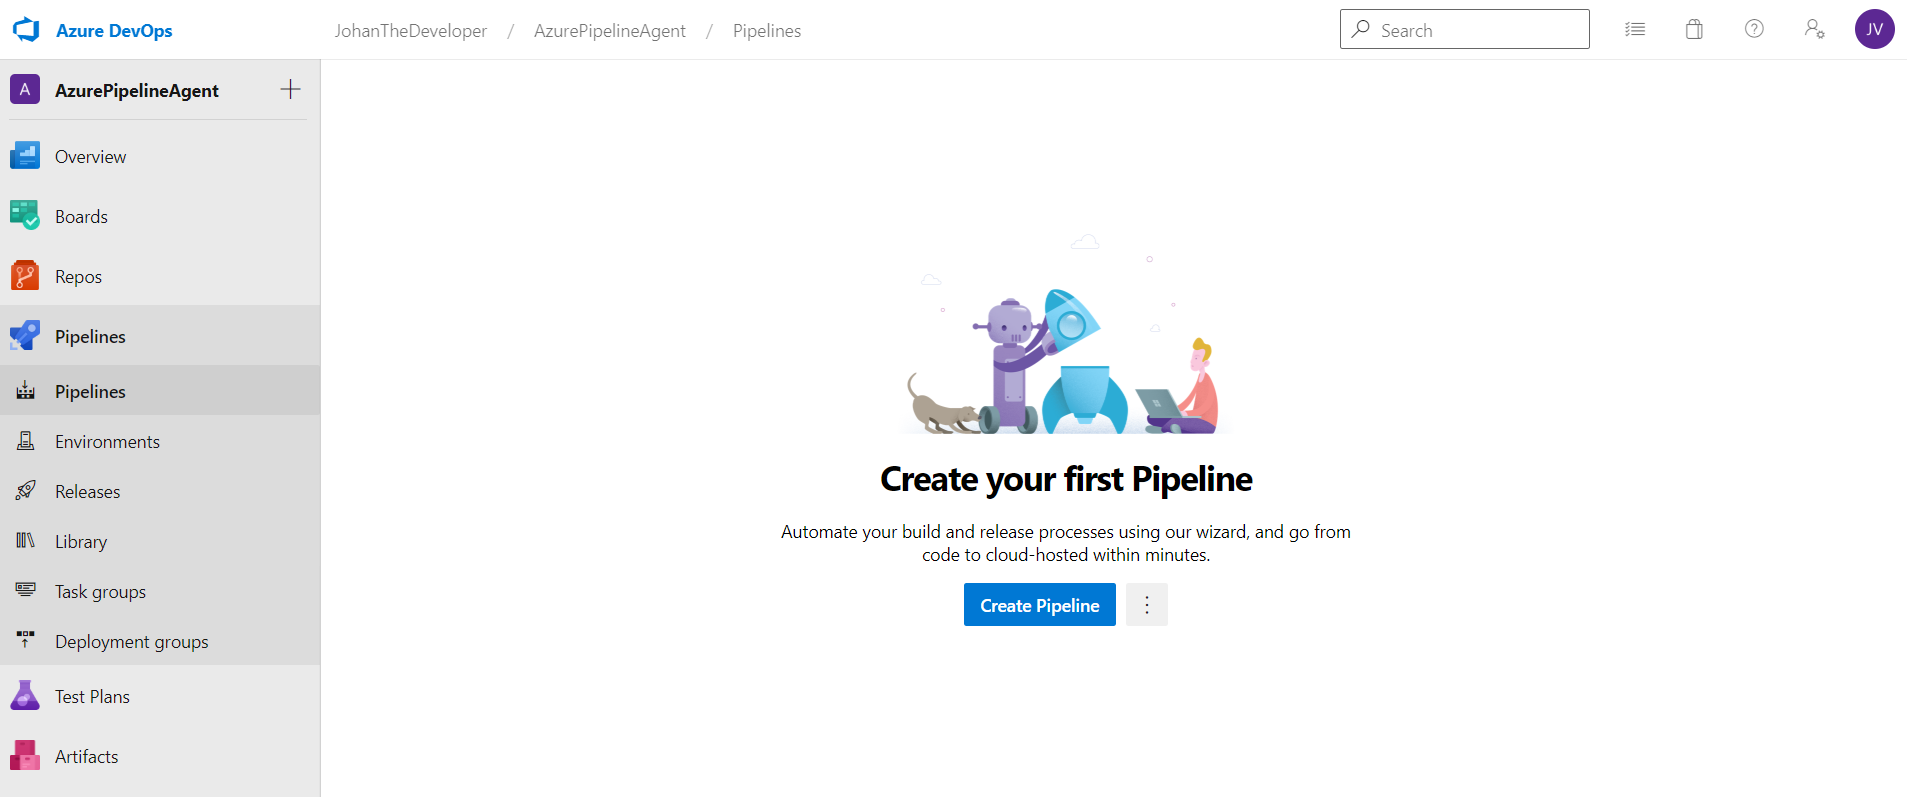
- Click on ‘Create Pipeline’
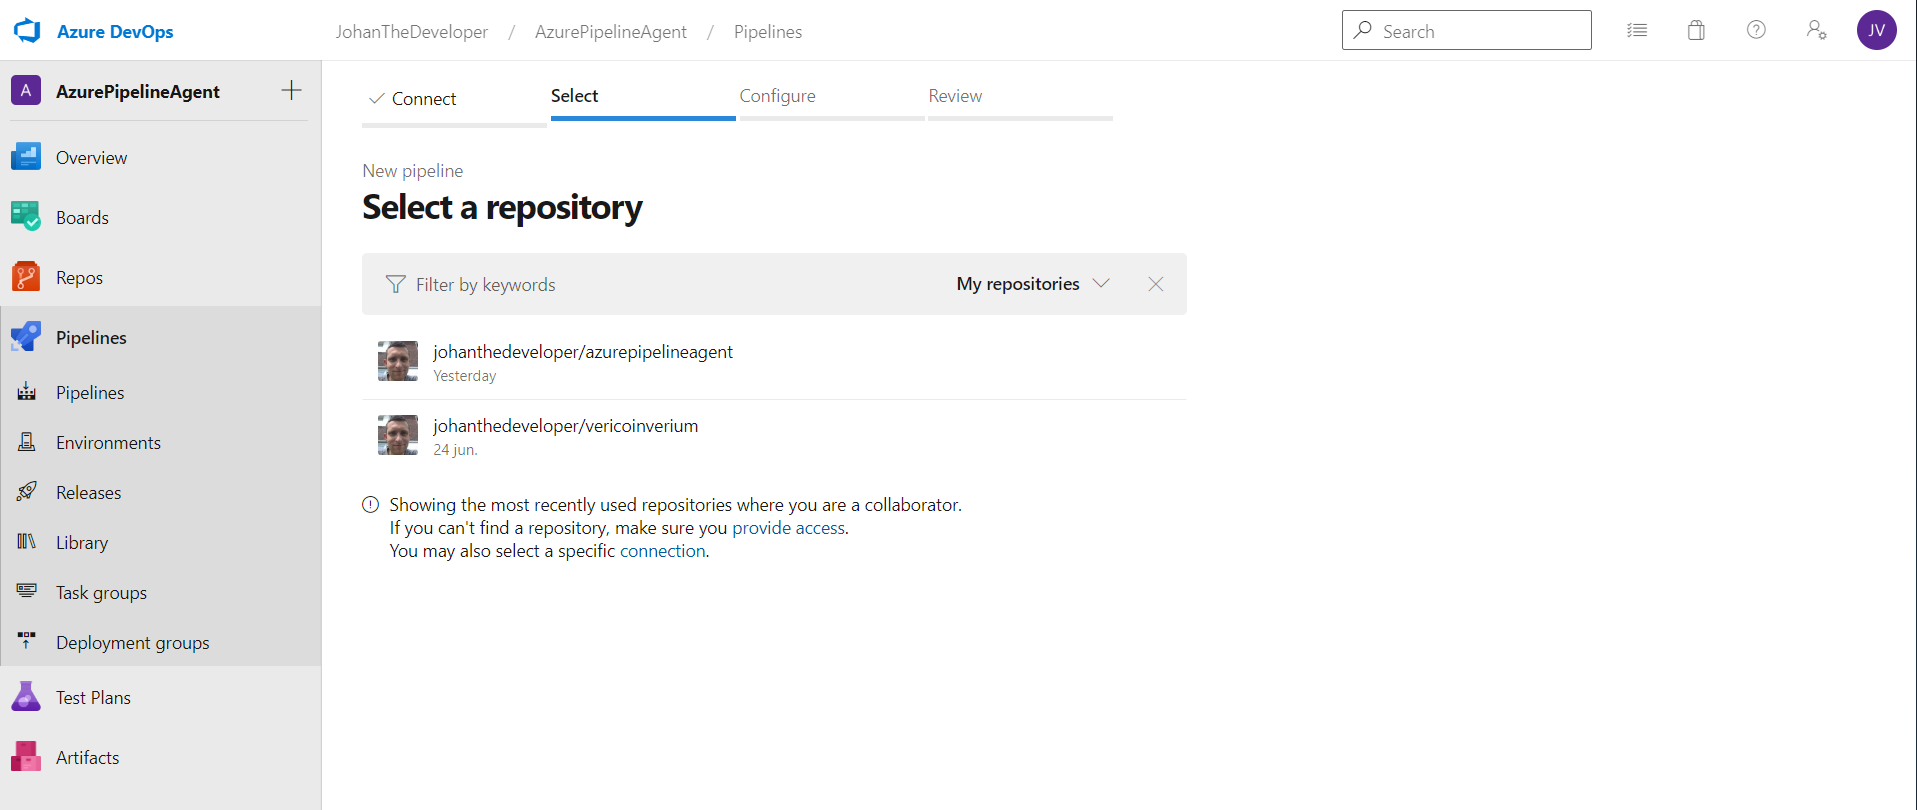
- Click on Github, because we want to connect this pipeline to our github repo
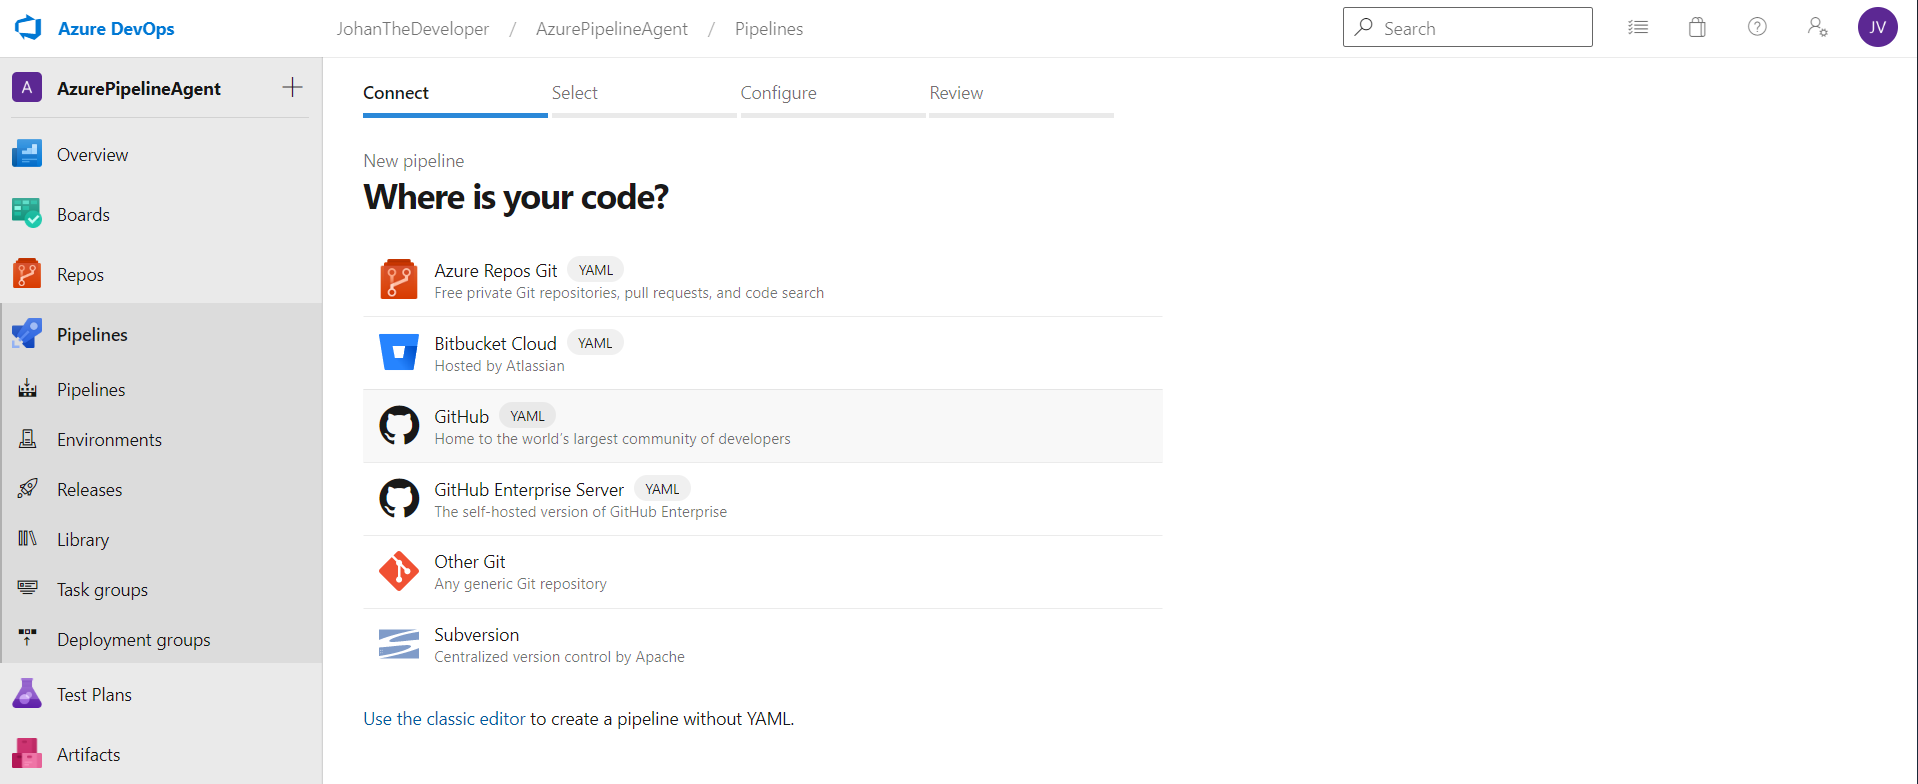
- Select your github repository. We are in this case going to select johanthedeveloper/azurepipelineagent
- Click on Docker. The option Docker give you a template yaml file where an example of building a Docker container is already done for you
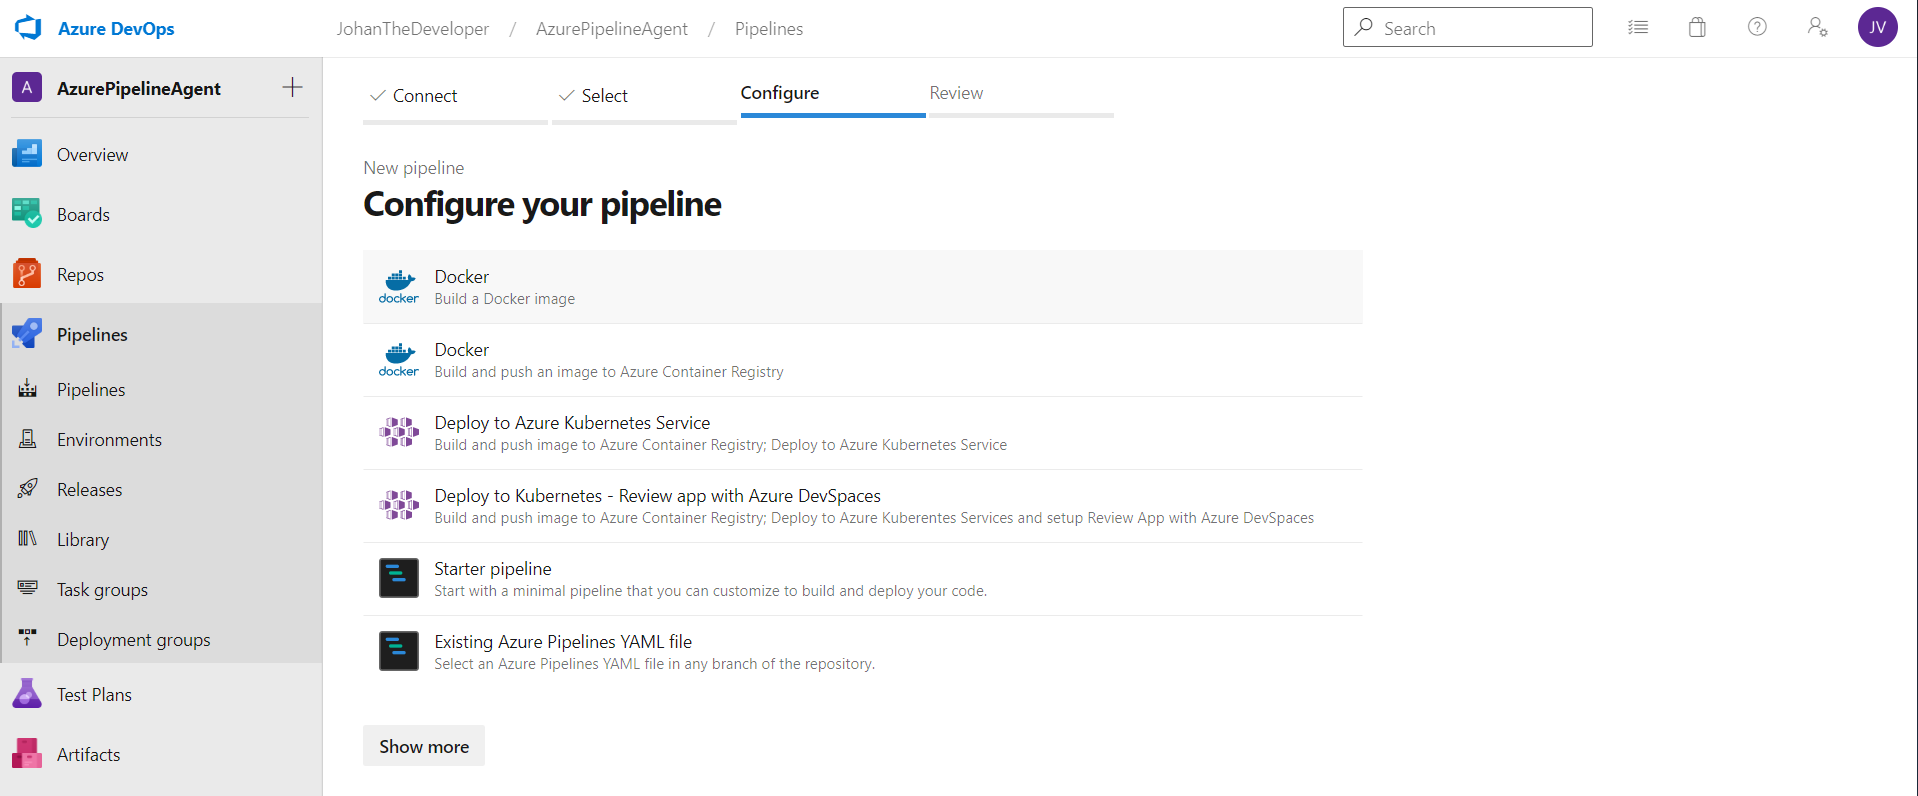
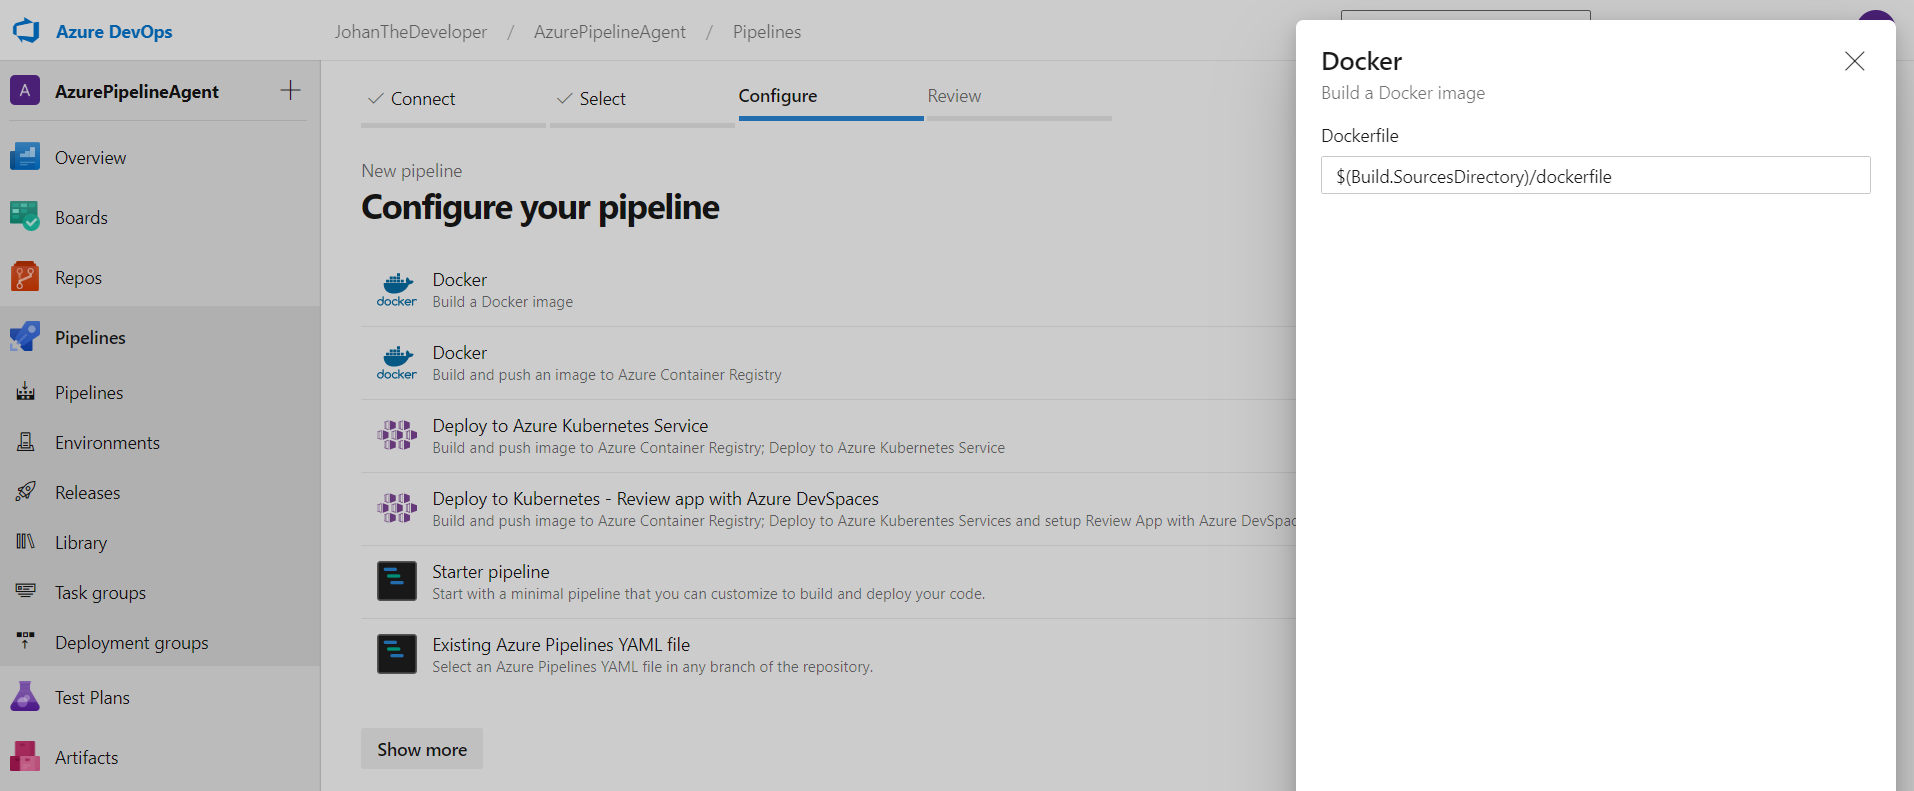
- The Docker file is in our case on the root directory. So we can continue.
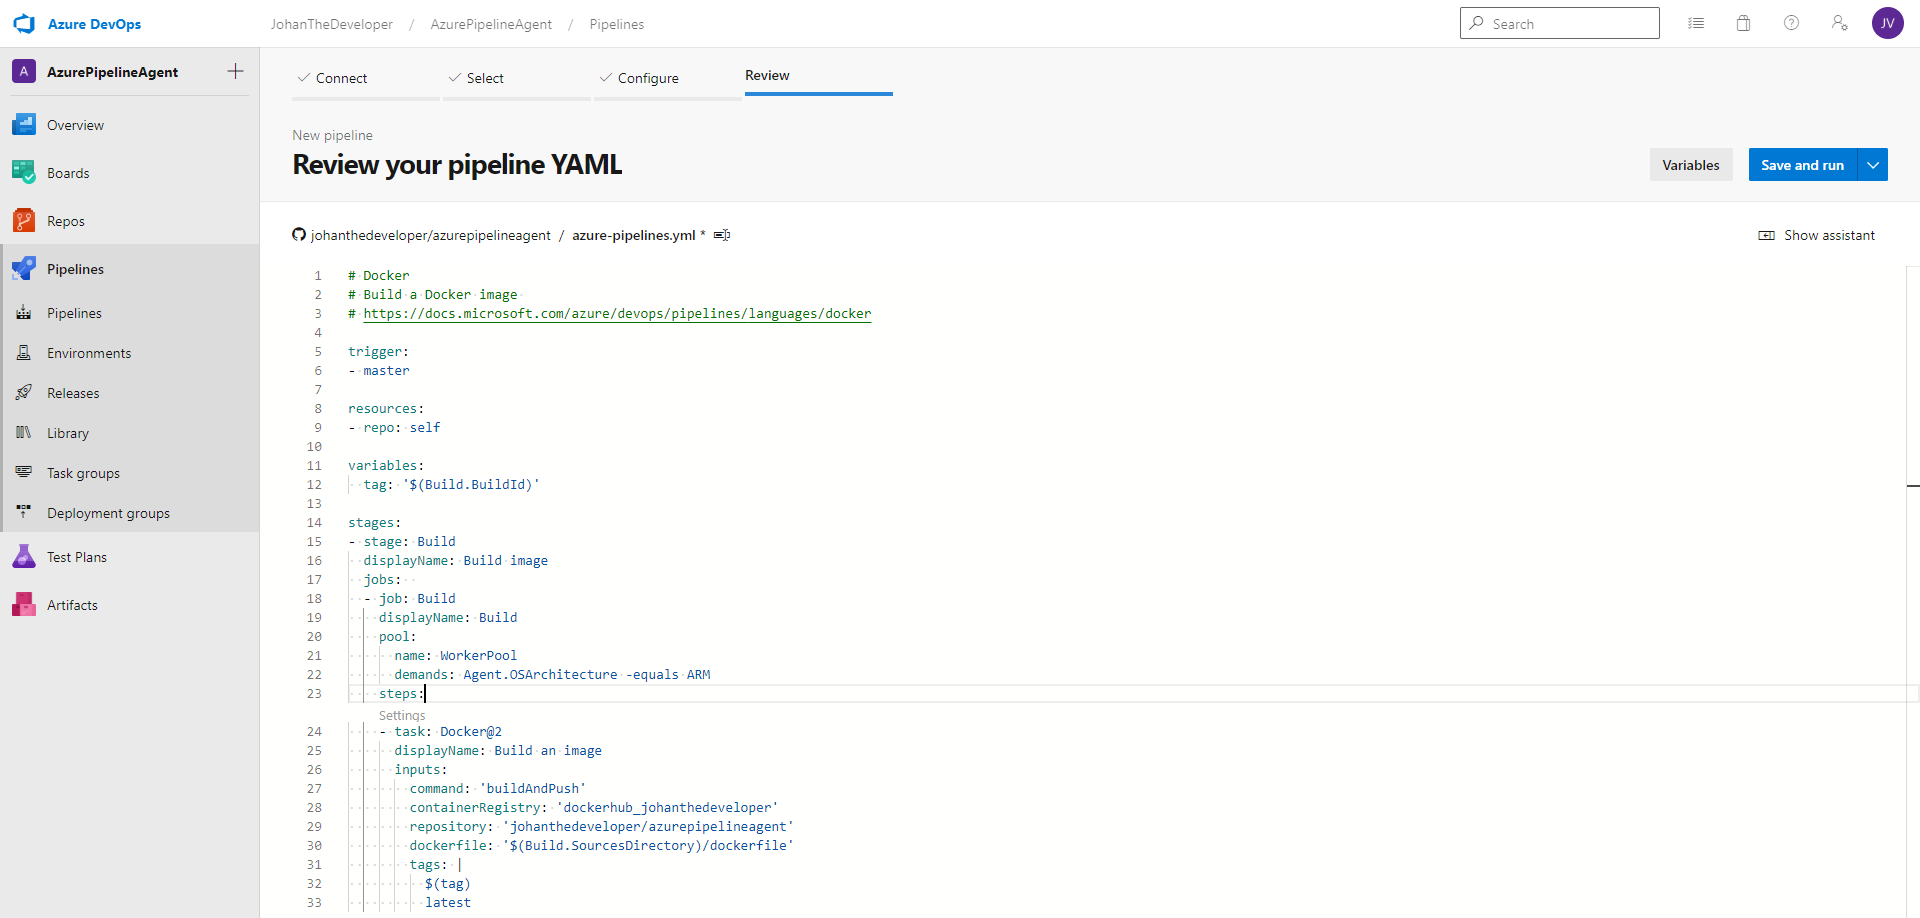
- And we have now our default Docker yaml template
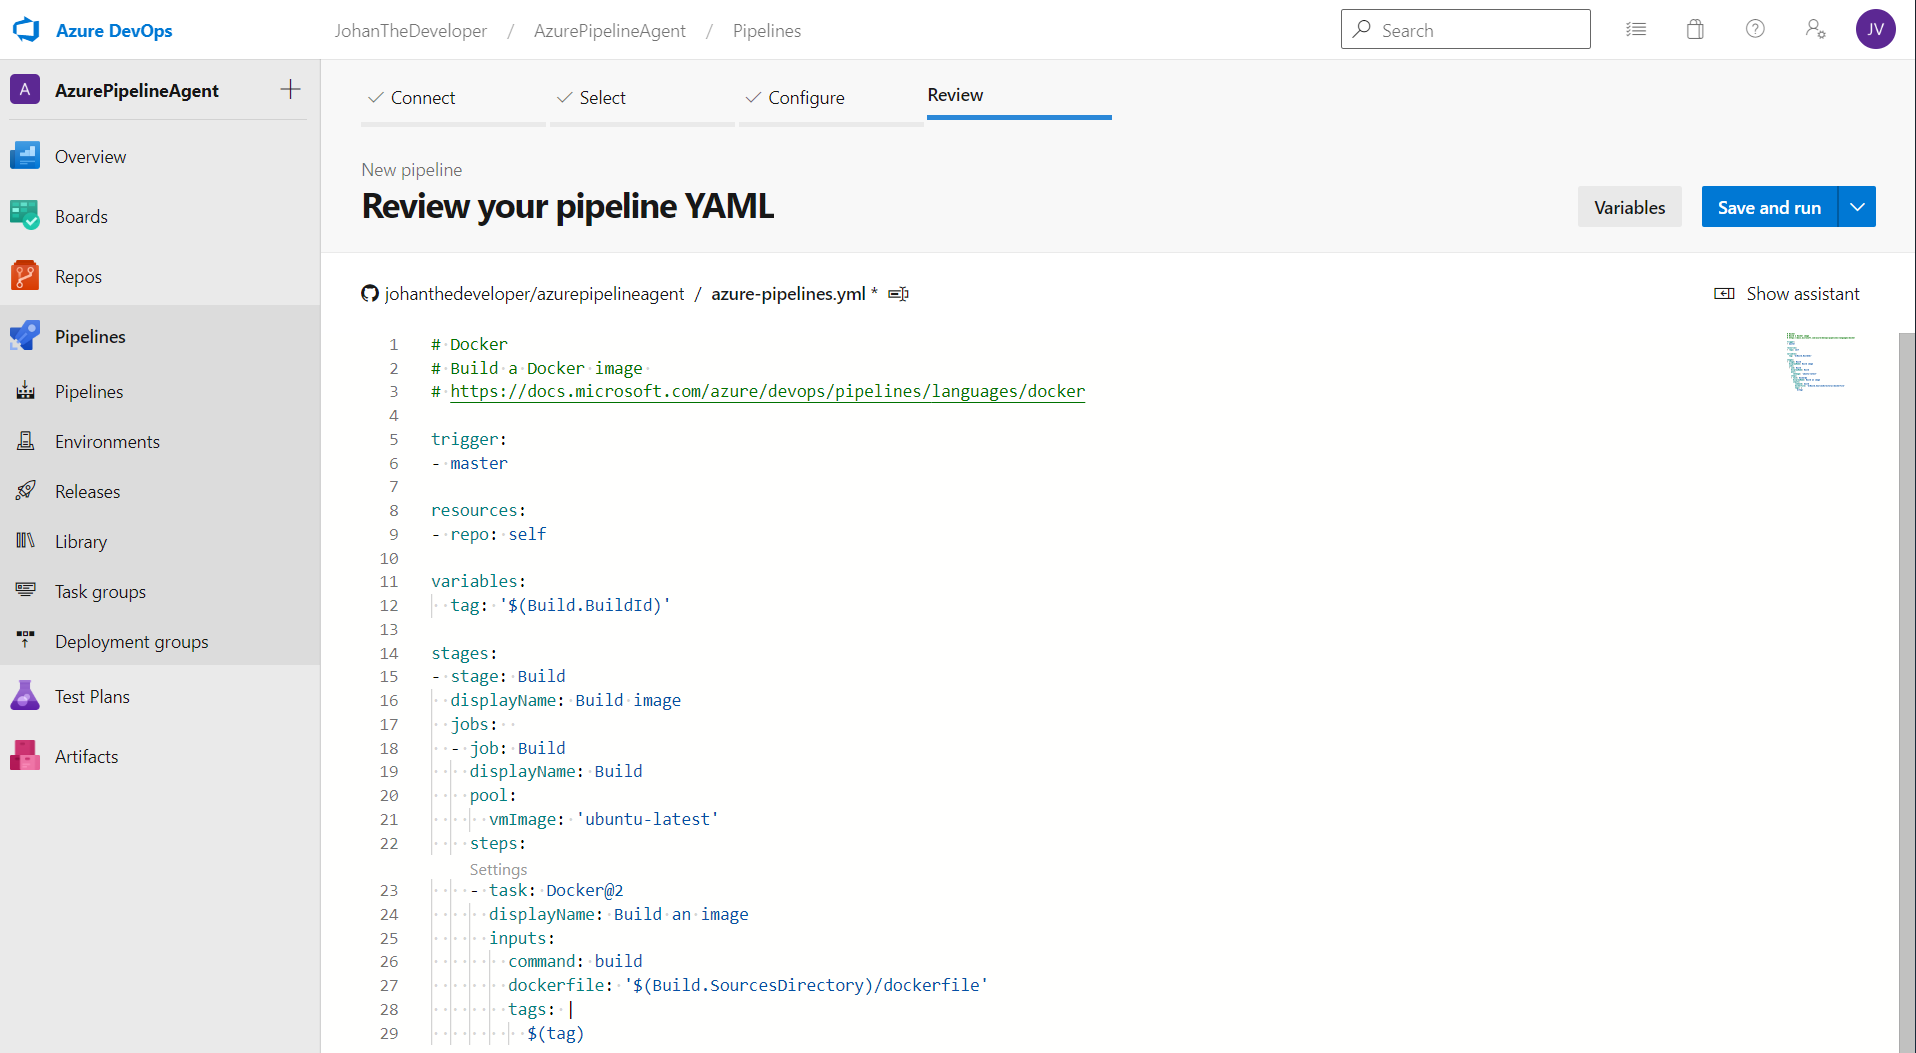
- Now we are going to change a few things:
- We are fist going to change our pool. This because we want to build this on your own azure pipeline agent who runs on an ARM processor. If you want the Docker image to be build for an other processor architecture you can change this.
- name: WorkerPool
- demands: agent.OSArchitecture -equals ARM
- The second thing we are going to change is the command. Because we want to build and push it, not only build.
- command: ‘BuildAndPush’
- The third adjustment is giving in your connection details to our Docker Hub
- containerRegistry: ‘dockerhub_johanthedeveloper’
- repository: ‘johanthedeveloper/azurepipelineagent’
- The last adjustment is to also tag this container with the tag latest
- tags: $(tag) latest
- We are fist going to change our pool. This because we want to build this on your own azure pipeline agent who runs on an ARM processor. If you want the Docker image to be build for an other processor architecture you can change this.
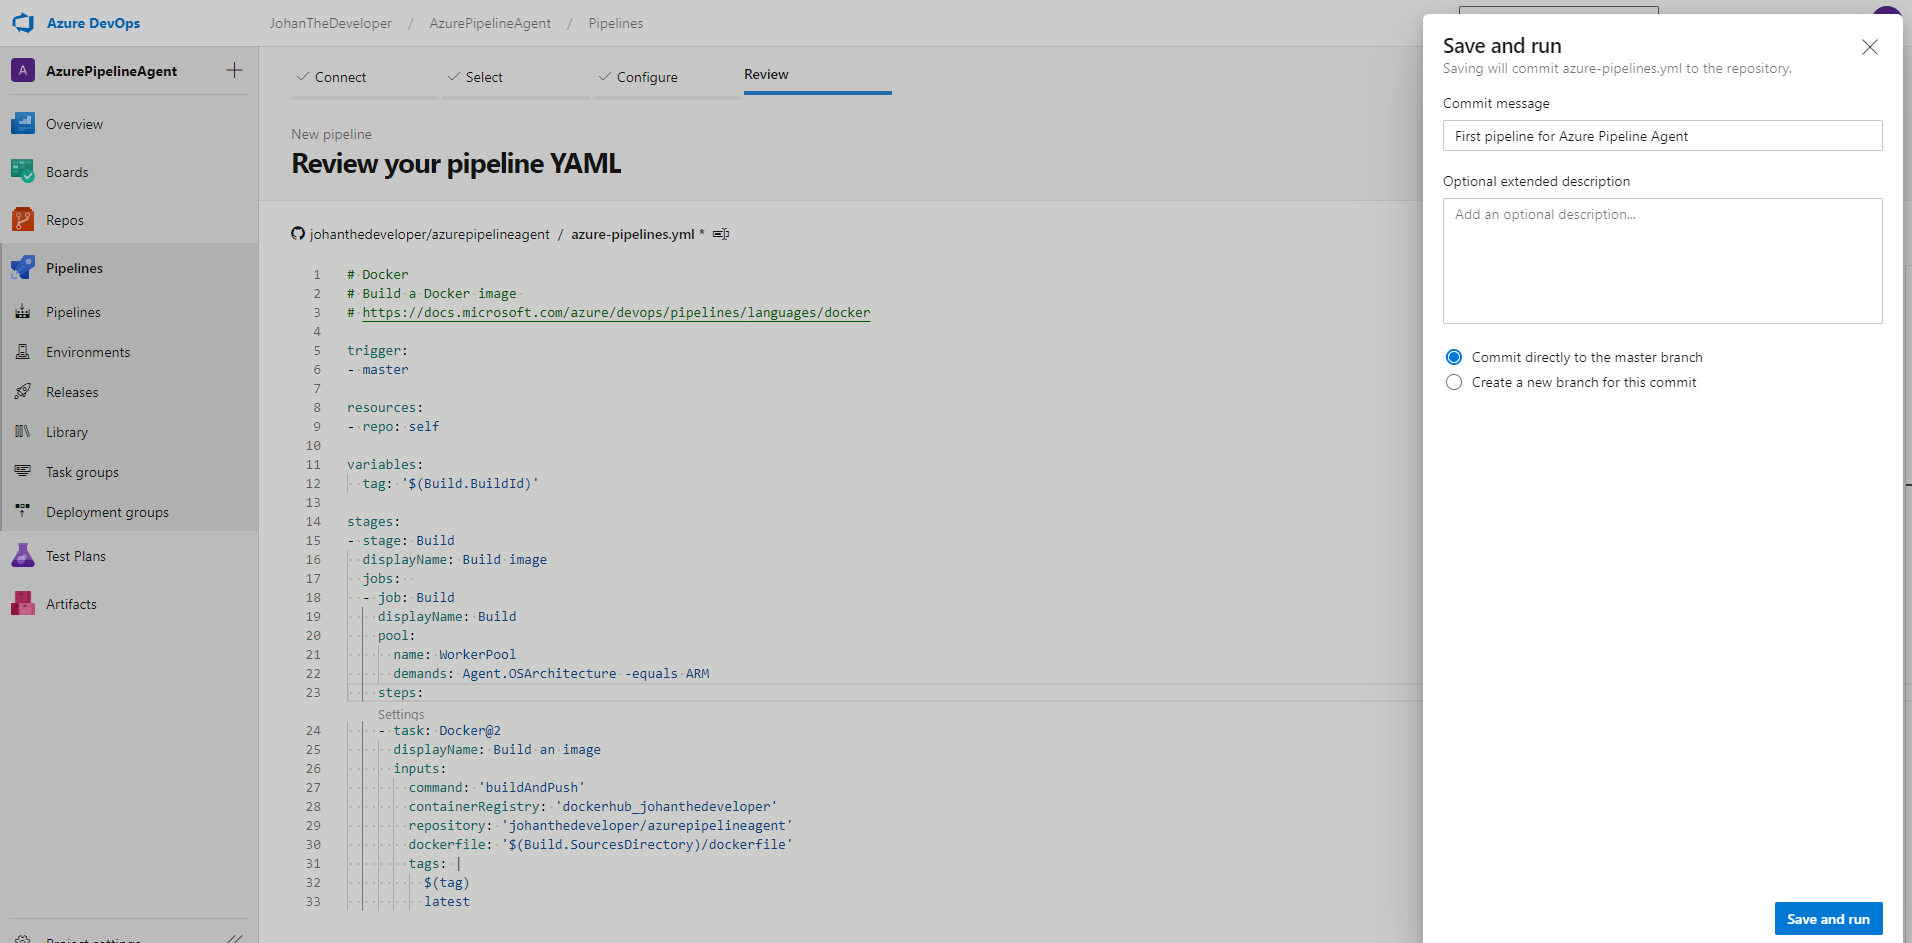
- Now we can click on ‘Save and run’. I would recommand always to push changes to a seperated branch. But in this case we are going to commit it directly to master.
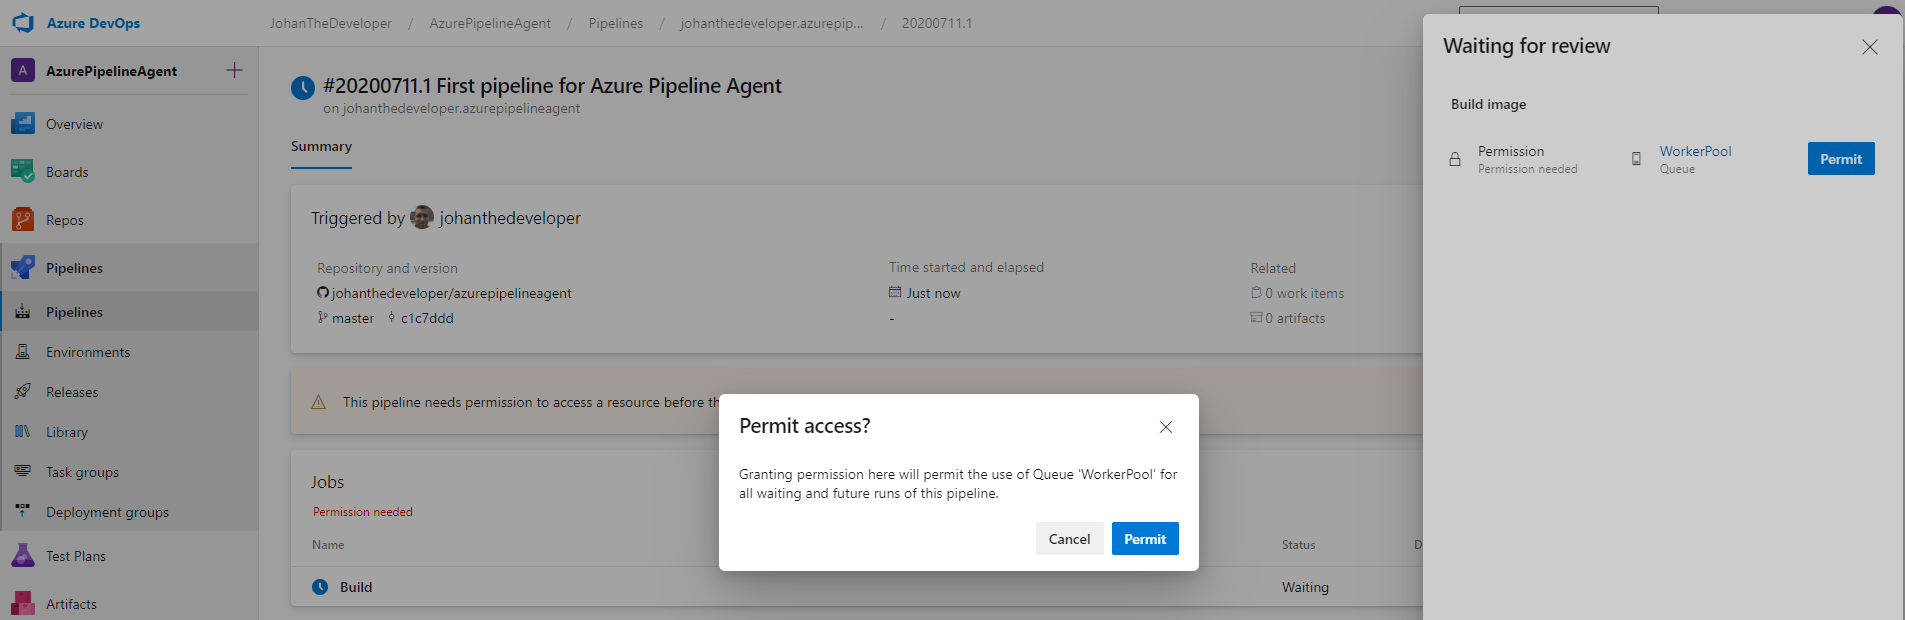
- If you see ‘This pipeline needs permissions to access a resource before this run can continue to Build image’, then you need to give this pipeline additional permissions. You can do this to click on ‘View’
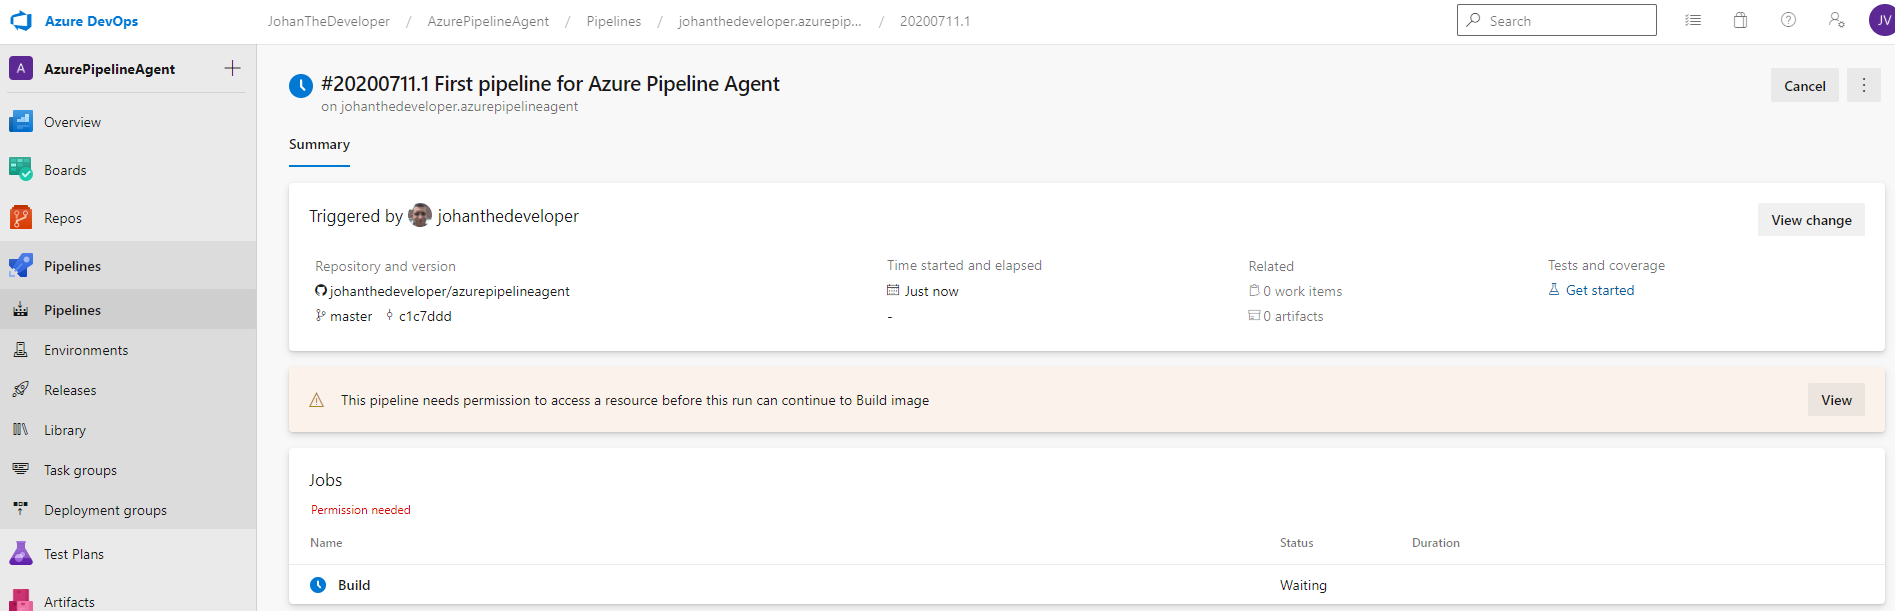
- Click on ‘Permit’ and again on ‘Permit’
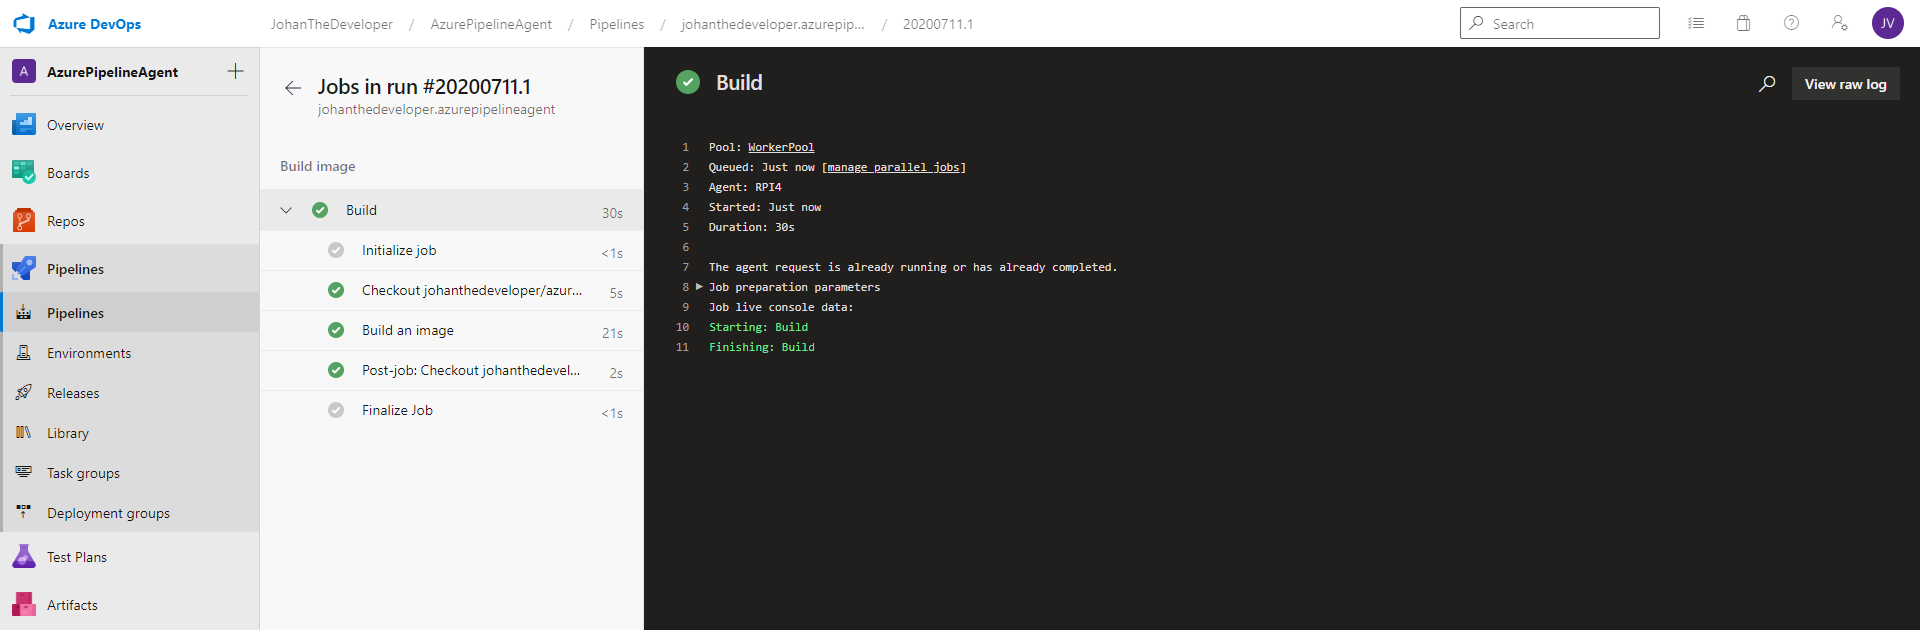
- Now you can wait until your build is finished. When it is finished you can see something like this:
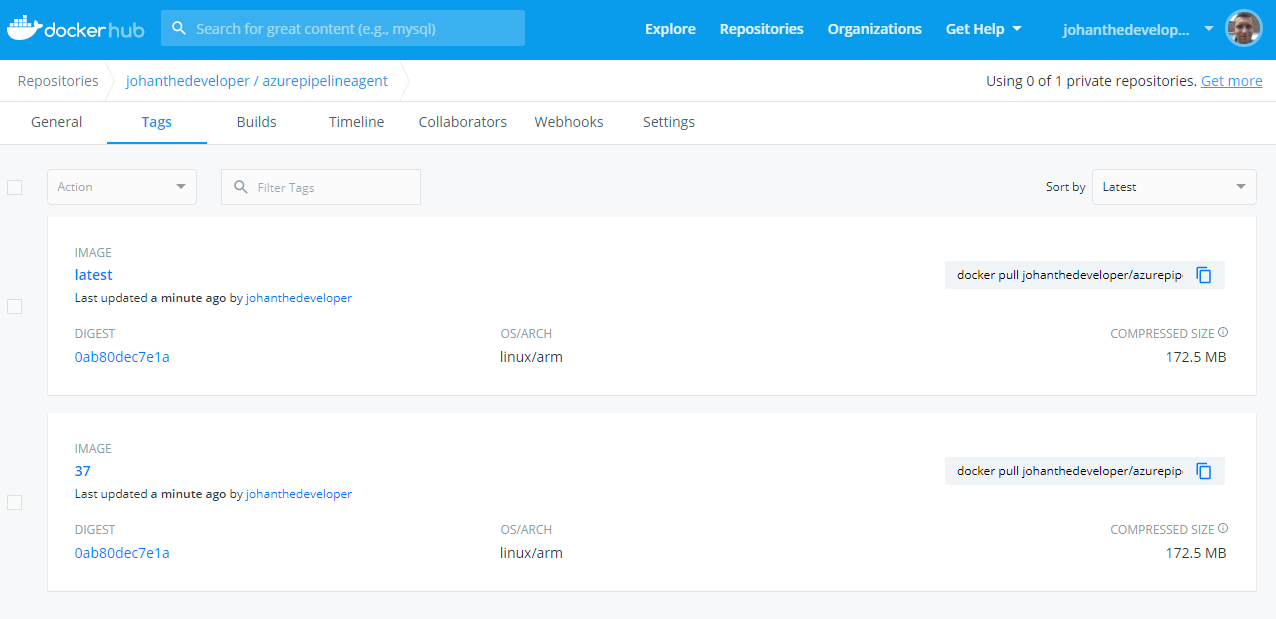
- To validate that the build was succesfull we now go to Docker Hub and then to the azurepipelineagent repositorie. You will see that the build was successfull.
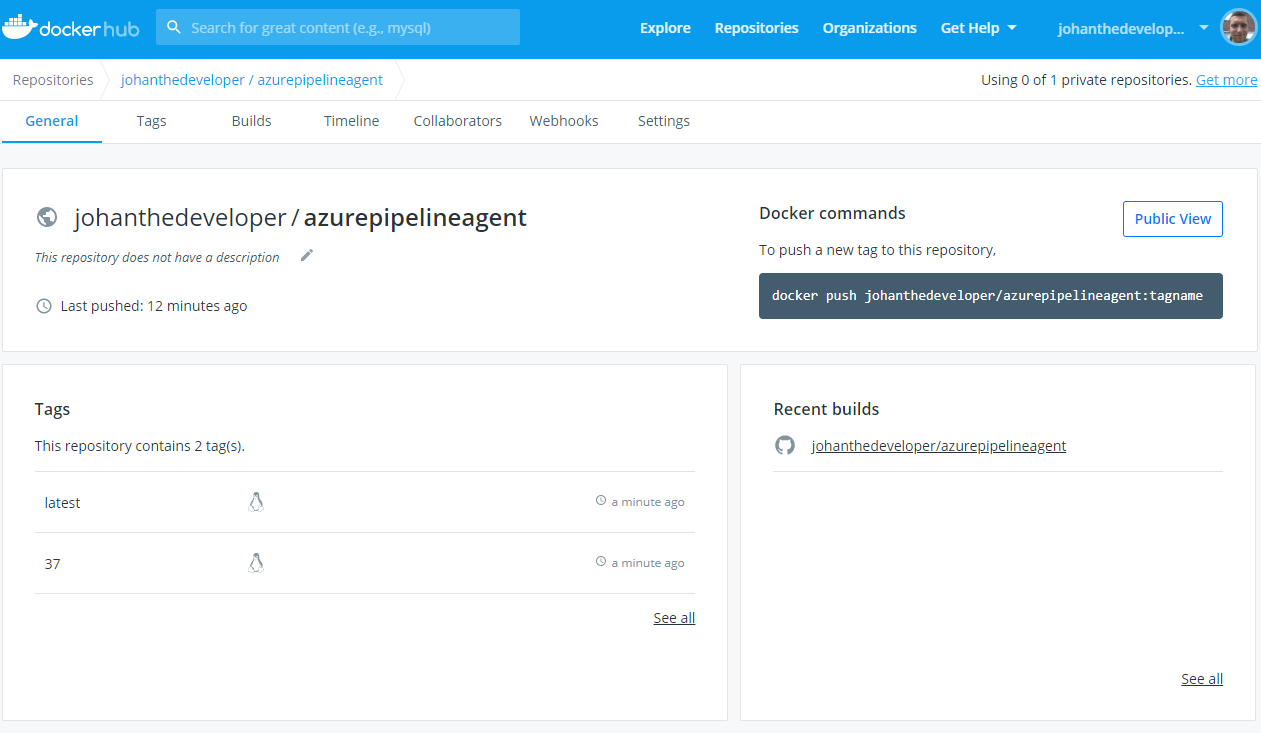
- If you go to ‘Tags’ you can see all your container images. You also can find here the command to pull this image from Docker Hub if you want
- I recomand to use the following command: “docker run -e AZP_URL=’https://dev.azure.com/{yoursubscription}/’ -e AZP_TOKEN='{yourpattoken}’ -e AZP_AGENT_NAME=azure-pipeline-agent -e AZP_POOL='{yourpoolname}’ -d –restart=always –net=host -v /var/run/docker.sock:/var/run/docker.sock –name Azure-Pipeline-Agent johanthedeveloper/azurepipelineagent:latest”